Stellar Sailor Dickey
Recently I was lucky enough to be a test knitter for the Stellar Sailor Dickey pattern by Paul Haesemeyer. It's definitely one I would recommend as a good weekend project - as long as you're comfortable with charted cables, this is a pretty quick knit!
I worked mine up using my favorite yarn - Joann's Big Twist. I did deviate just a touch by adding in some store bought pompoms instead of making my own, but the color was a perfect match! How could I resist?
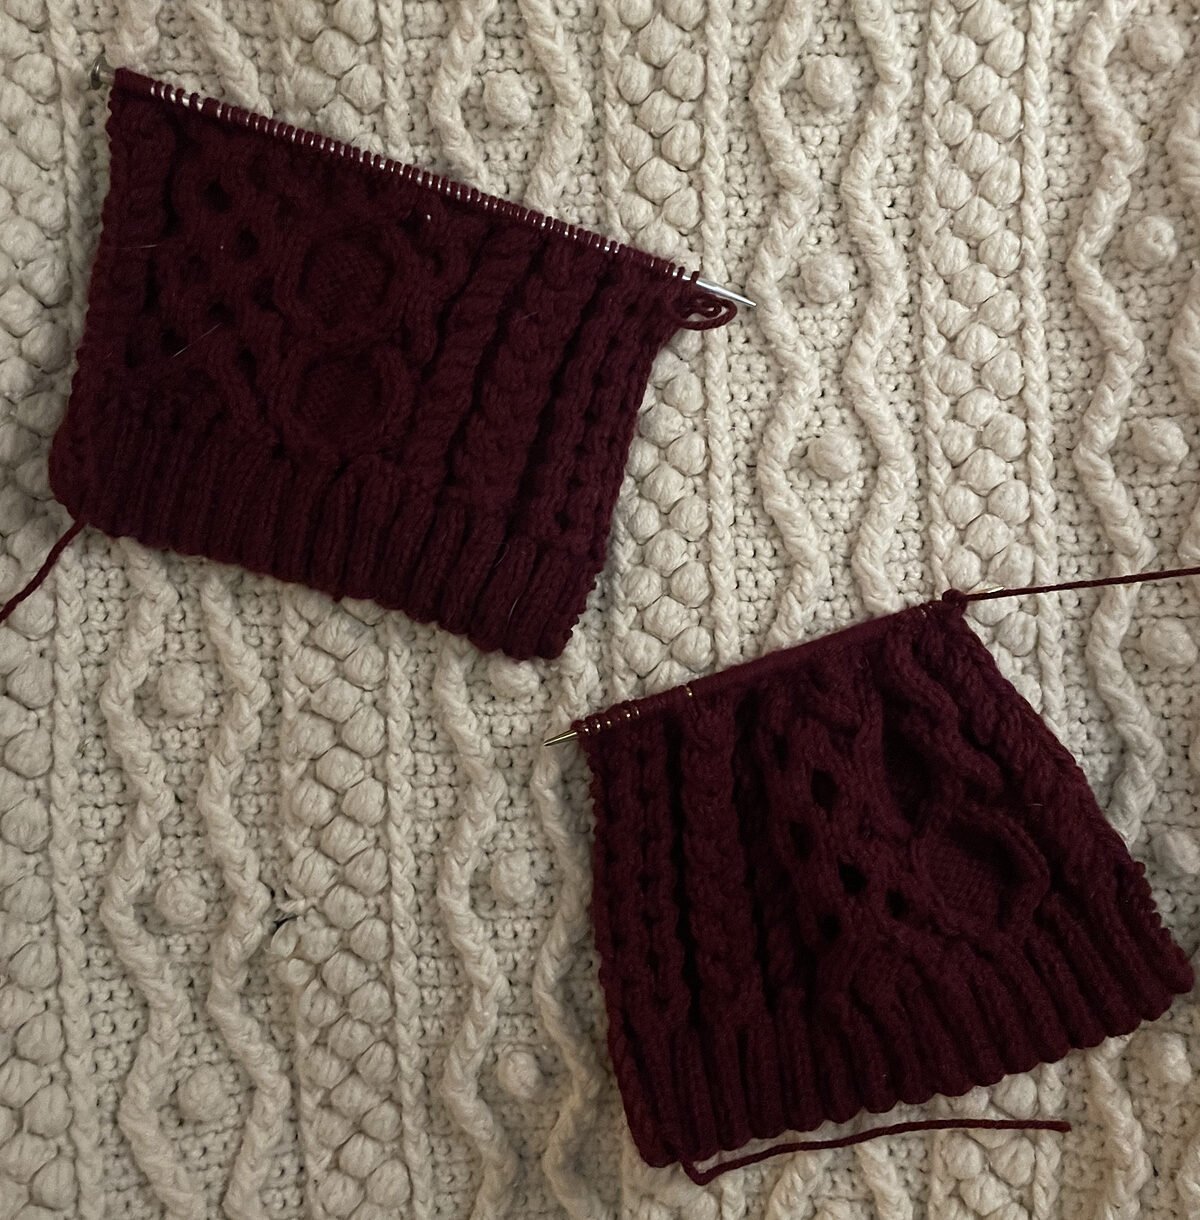
in progress, just before joining front and back to work in the round
One of the things that I really like about this piece is that it tucks in really smoothly. Wearing it outside a coat or jacket really shows off the cables, but wearing it tucked in does an incredible job of shielding from wind and snow. I've actually already started on a second one in brown, which is going to go to my roommate.
If you haven't already, be sure to head on over to Paul Haesemeyer's ravelry page to check out his patterns!
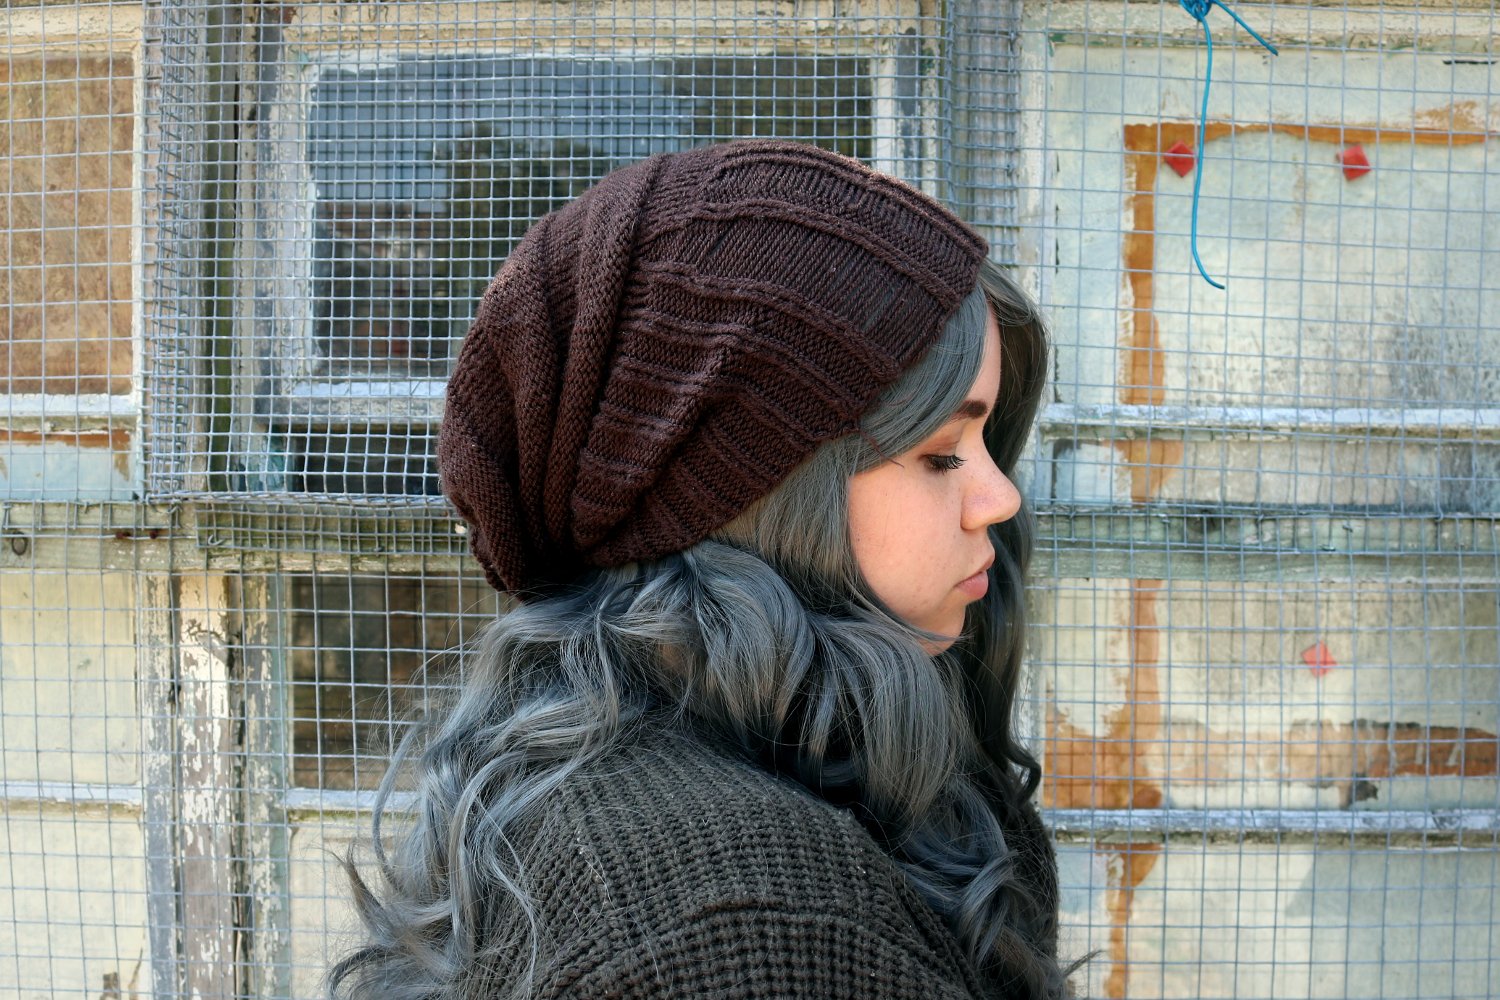
Razor's Hat from World Enough and Time
I was recently asked to make Razor's Hat from the Doctor Who episode World Enough and Time. I wrote up a pattern just in case anyone else was interested in making one for themself!What you'll need:
US size 6 needles (4.0 mm)
Double knit yarn
I used Stylecraft Special DK in Dark Brown Shade 1004I found that if you want to make your hat distressed in a similar way to the show, it is easier to prevent unraveling if you create the distressing as you go. I've included two versions of the hat, one with distressing and one without.
Unfamiliar terms explained:
DSPU: drop stitch and pull out stitches all the way to the brim, pick up a stitch on your left needle, ready to be worked as the next stitchCO 112 stitches in the round
With Distressing
Row 1-17: (K2, P2) 28 times
Row 18: (K2, P2) 2 times, K2, DSPU, P2, (K2, P2) 25 times [112 st]
Row 19-20: (K2, P2) 28 times
Row 21: K112
Row 22-33: (K2, P2) 28 times
Row 34: (K2, P2) 17 times, K2, DSPU, P2 (K2, P2) 10 times [112 st]
Row 35-40: (K2, P2) 28 times
Row 41: (K2, P2) 16 times, K1, DSPU, K1, P2 (K2, P2) 11 times [112 st]
Row 42-47: K112
Row 48: K71, DSPU, K 41 [112 st]
Row 49-51: K112
Without Distressing
Row 1-20: (K2, P2) 28 times
Row 21: K112
Row 22-41: (K2, P2) 28 times
Row 42-51: K112
Both Versions
Row 52-61: P112
Row 62-71: K112
Row 72-81: P112
Row 82-91: K112
Row 92-101: P112
Row 102-111: K112
Row 112-120: P112
Row 121: K2tog [56 st]
After working the last row, pull a piece of yarn through and pull as tight as possible. Weave in your ends and your hat is complete!
13th Doctor Striped Socks
These socks were super fun to make, so I wrote up the pattern and made a video tutorial! Let me know what you think, and be sure to let me know if you make a pair!
https://youtu.be/iFmZZbX1GSE
Materials:
Special Stylecraft Double Knit in Lapis
Special Stylecraft Double Knit in Duck Egg
3.25 mm Knitting Needles (US3/UK11)
Pattern:
Cast on 60 stitches in Dark Blue
K1P1 all the way around for 8 rows
K all the way around for 8 rows
*Switch to Light Blue, K all the way around for 4 rows
Switch to Dark Blue, K all the way around for 4 rows
Repeat from * four times, making a total of 5 Dark Blue and 5 Light Blue stripes
Switch to Light Blue, K all the way around for one and a half rowsShift needles so that you can start the heel from the center back of the work
HEEL & TOE
K 15 stitches, turn
Row 1: sl st, P29, turn
Row 2: sl st, K28, turn
Row 3: sl st, P27, turn
Row 4: sl st, K26, turn
Row 5: sl st, P25, turn
Row 6: sl st, K24, turn
Row 7: sl st, P23, turn
Row 8: sl st, K22, turn
Row 9: sl st, P21, turn
Row 10: sl st, K20, turn
Row 11: sl st, P19, turn
Row 12: sl st, K18, turn
Row 13: sl st, P17, turn
Row 14: sl st, K16, turn
Row 15: sl st, P15, turn
Row 16: sl st, K14, pick up stitch from between previous worked stitch and next stitch on left needle (denoted as m1), k2tog, turn
Row 17: P15, m1, p2tog, turn
Row 18: K16, m1, k2tog, turn
Row 19: P17, m1, p2tog, turn
Row 20: K18, m1, k2tog, turn
Row 21: P19, m1, p2tog, turn
Row 22: K20, m1, k2tog, turn
Row 23: P21, m1, p2tog, turn
Row 24: K22, m1, k2tog, turn
Row 25: P23, m1, p2tog, turn
Row 26: K24, m1, k2tog, turn
Row 27: P25, m1, p2tog, turn
Row 28: K26, m1, k2tog, turn
Row 29: P27, m1, p2tog, turn
Row 30: K28, m1, k2tog, turn
Row 31: P29, m1, p2tog, turn
HEEL ONLY
Row 32: K 15
Adjust stitches so that you can continue working with your Light Blue yarn where you left off. Complete that row in knit stitch, and then do two more rows of knit stitch in Light Blue.
*Switch to Dark Blue, K all the way around for 4 rowsSwitch to Light Blue, P all the way around for 4 rows
Repeat from * until your sock is the right length for your foot.
For reference, I had a total of 5 Dark Blue and 5 Light Blue stripes for my UK size 5 feet.
Refer back to the heel instructions and work the toe the same as the heel.
Complete the sock with kitchener stitch and weave in your ends.
Tada! You now have your own pair of 13th Doctor Socks!
Homeward Bound Fingerless Mittens
 When I first saw this lovely brown yarn, I knew immediately that I wanted to make some sort of glove or mitten for myself from them. My aunt got the yarn from a place called Pacesetter Alpacas in Beloit, Wisconsin. It's a wonderfully soft yarn, and I actually got to meet the alpaca from which the wool was collected! I unfortunately lost the label for this yarn, but if I remember correctly, it was a blend of two different kinds of alpacas.
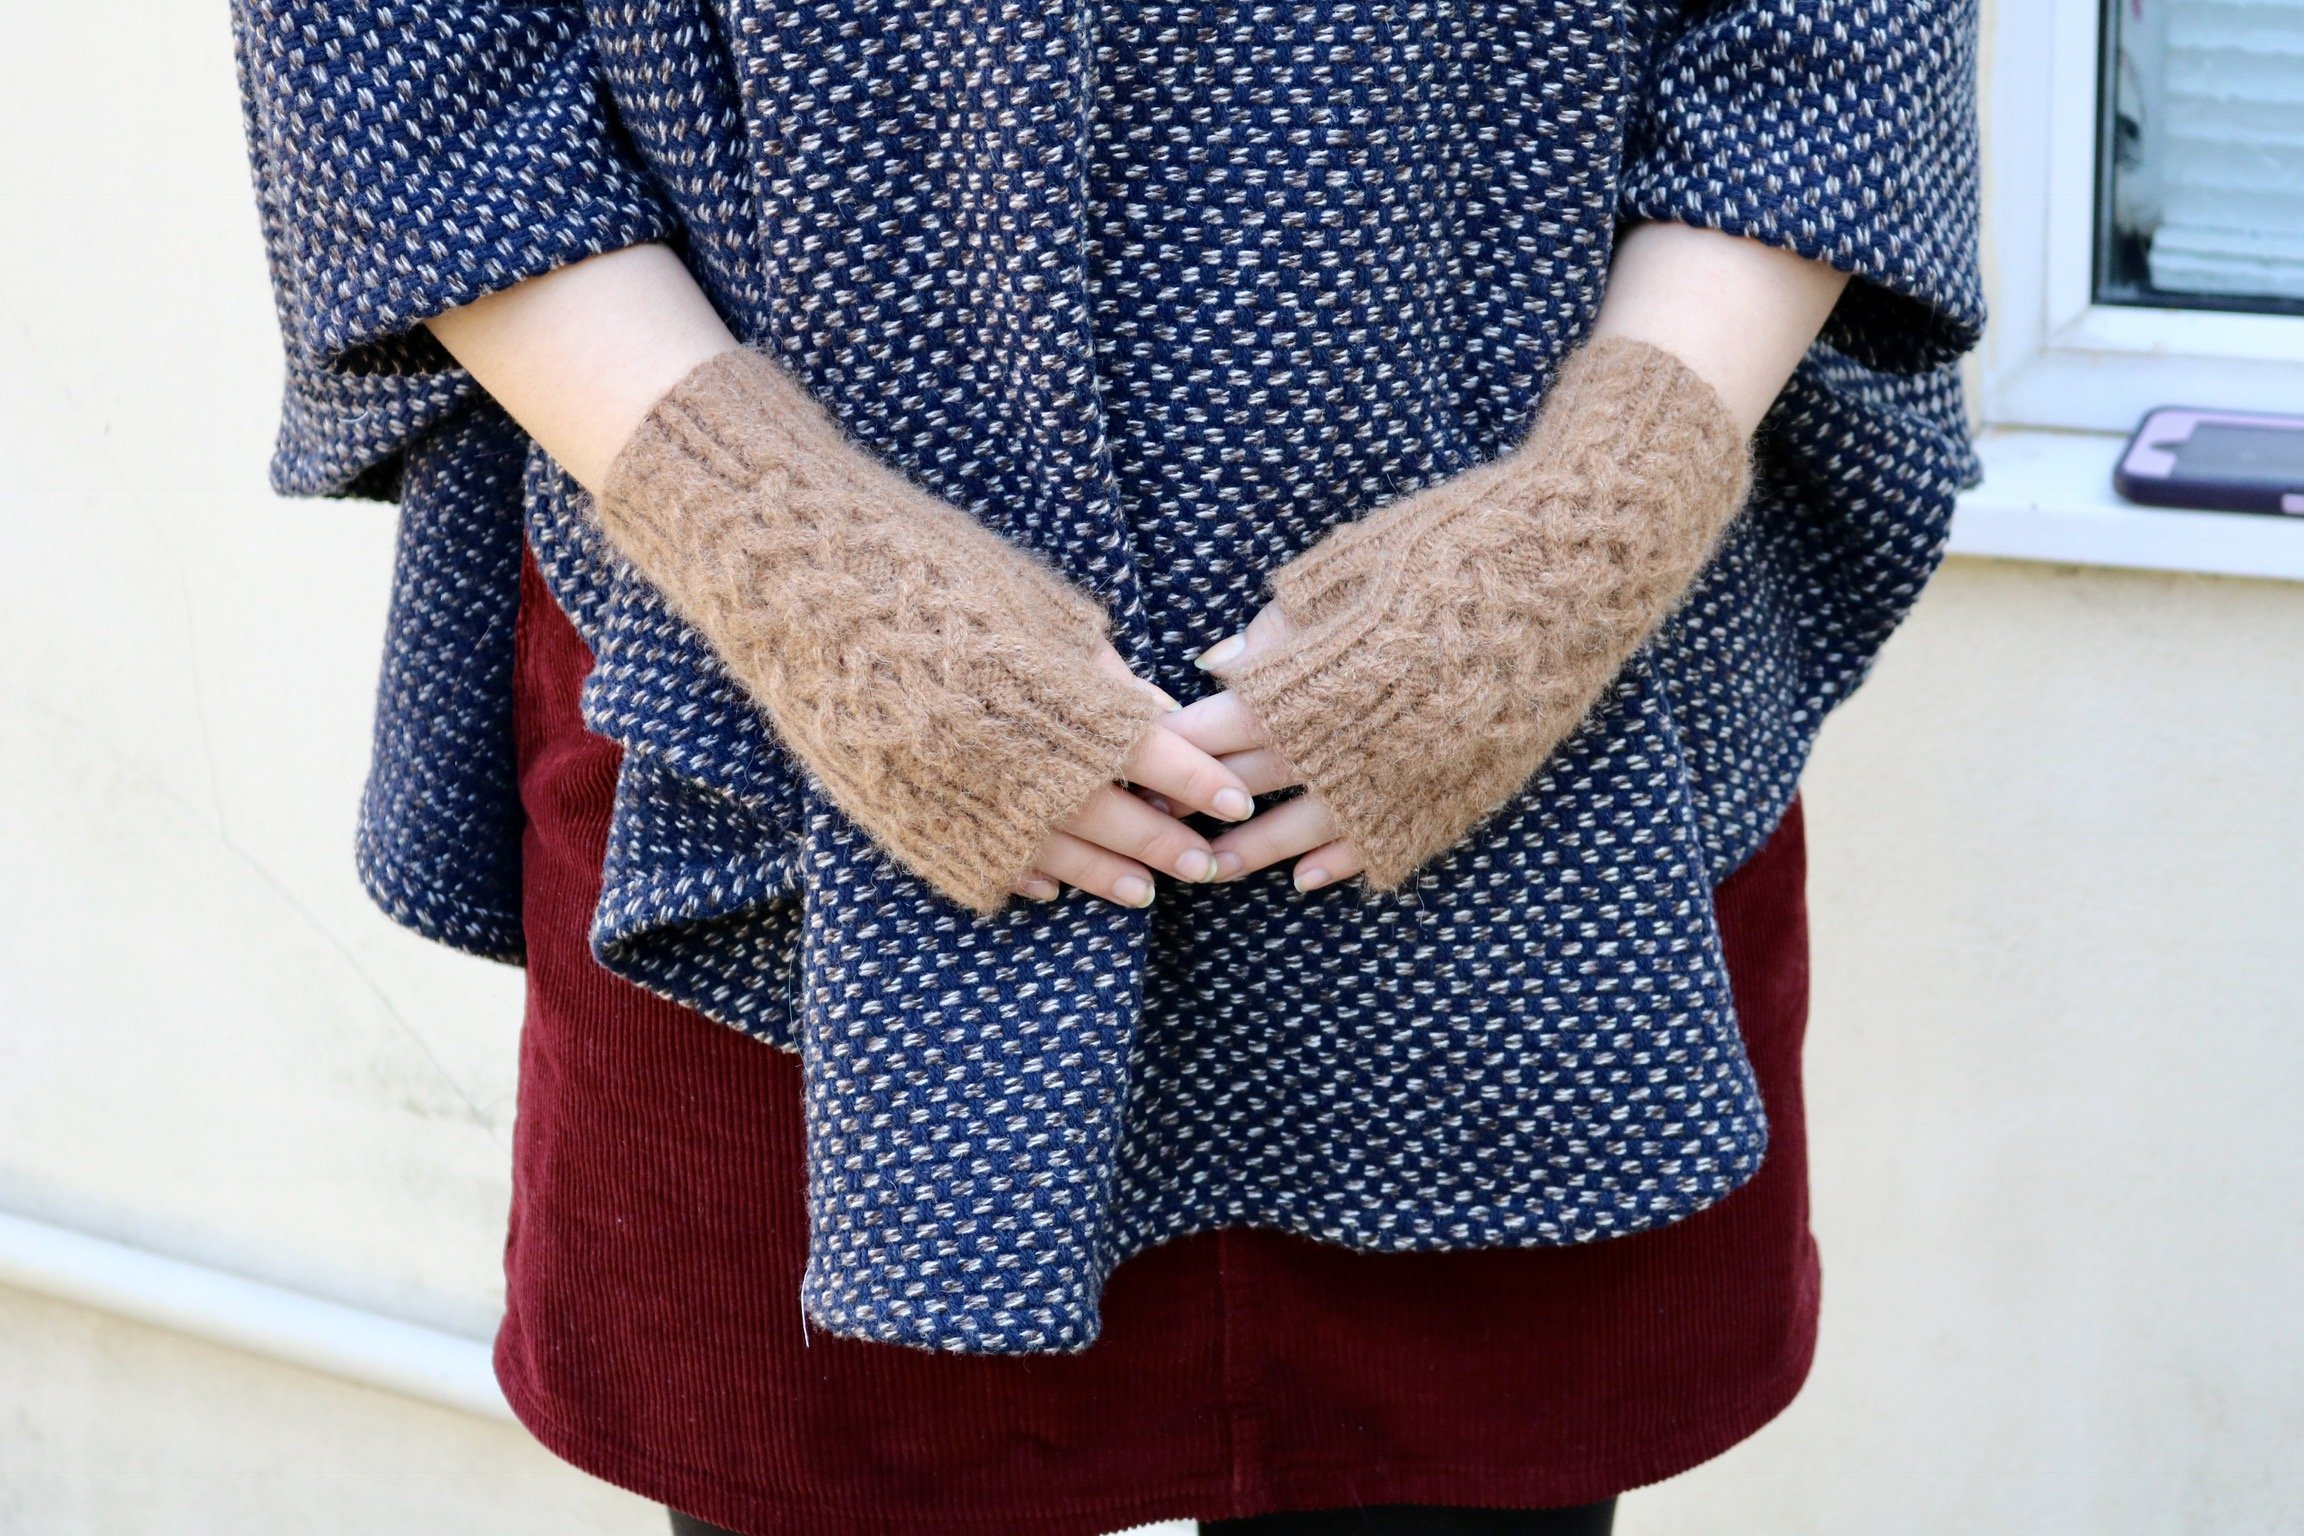 Because this yarn was so nice, I wanted to pick the perfect pattern. After much searching, I settled on the Homeward Bound Mitts. The cables on the backs of these mittens caught my eye immediately. I hadn't knit anything with particularly complicated cables before and this looked like a good way to challenge myself.
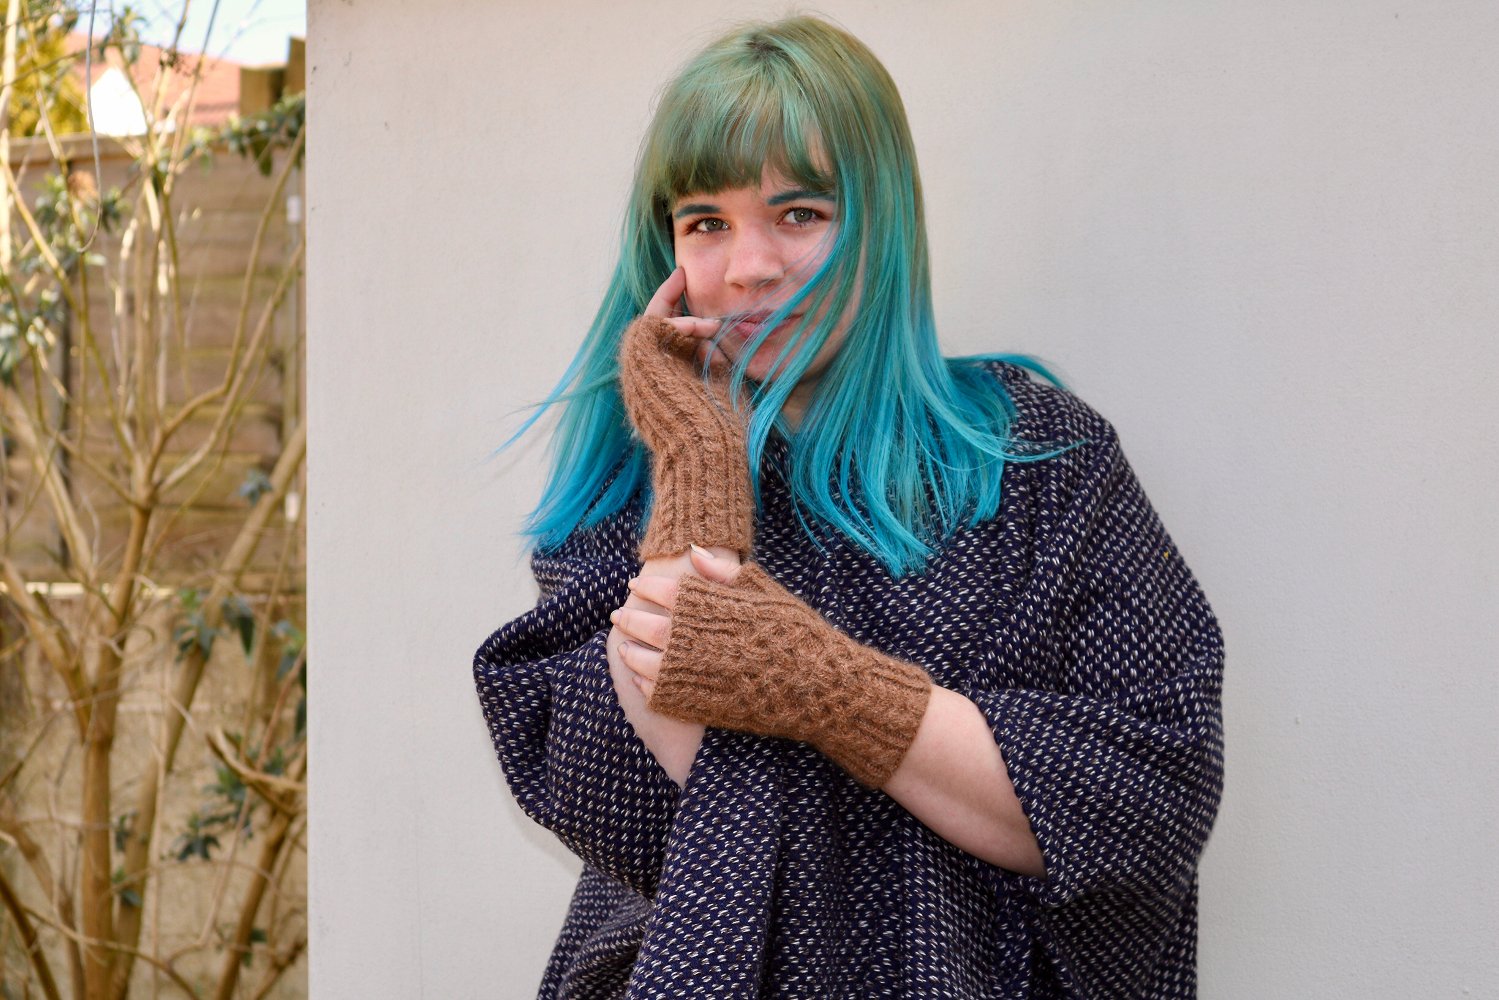
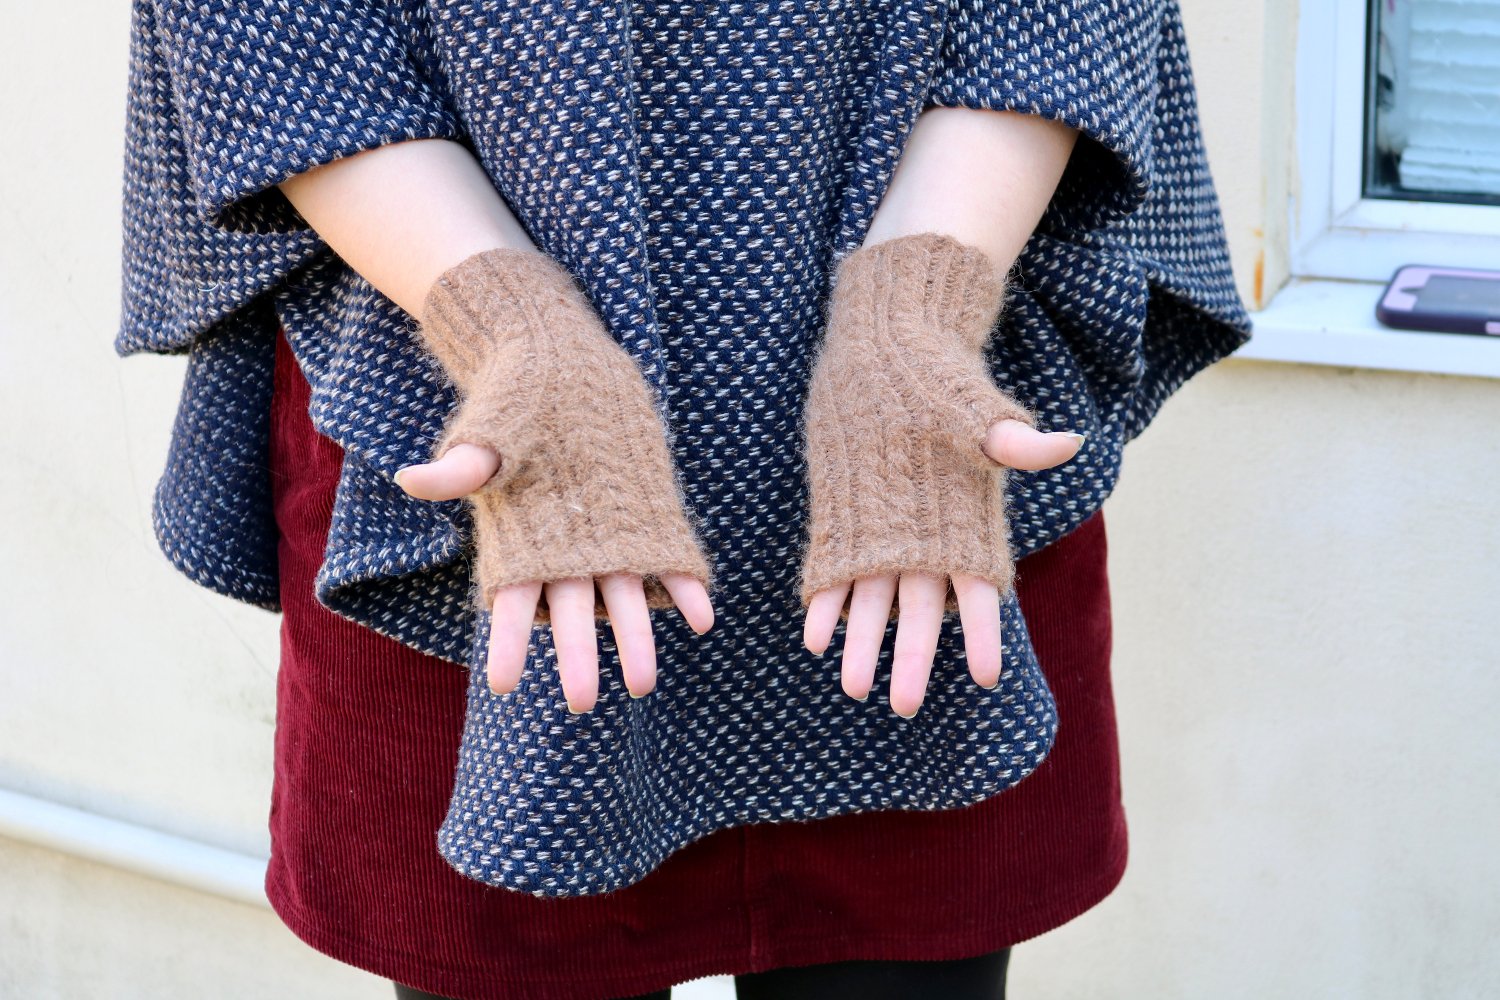 I made these mittens for myself in size 1 using 3.25 mm/US size 3/UK size 10 DPNs. Because I wasn't planning on switching needles between the wrist and hand of the glove I chose a size between the two recommended in the pattern. I was a little concerned that they wouldn't fit properly, but it turned out fine By mistake, I left off the rib on the bottom of the mittens, but I don't think it's too noticeable.
 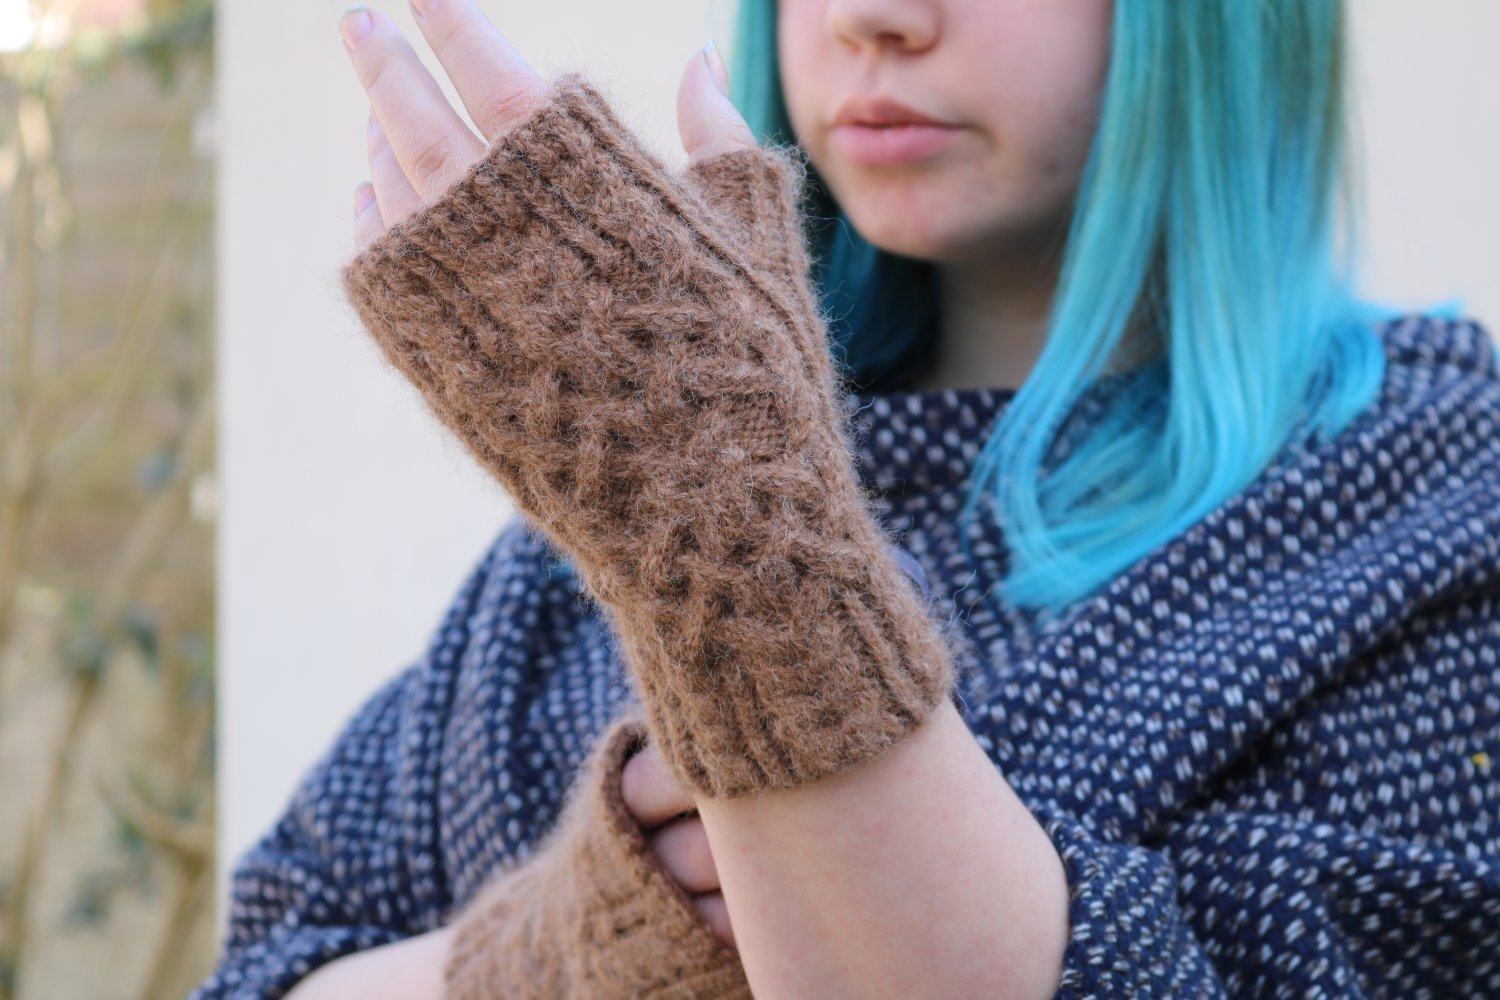 The pattern for these mittens was really well written, and included charts for all the cabling sections. I had never made a thumb before, and this pattern described how to knit one well enough that I made almost no mistakes! I love these mittens, and I'm almost tempted to make myself a pair in every color.
Nardole from Doctor Who
On the second day of London MCM, I wore a cosplay of Nardole from the Doctor Who episode Eaters of Light. I'm starting with the second day because I neglected to get pictures of the costume I wore the first day, but hopefully I'll get some soon.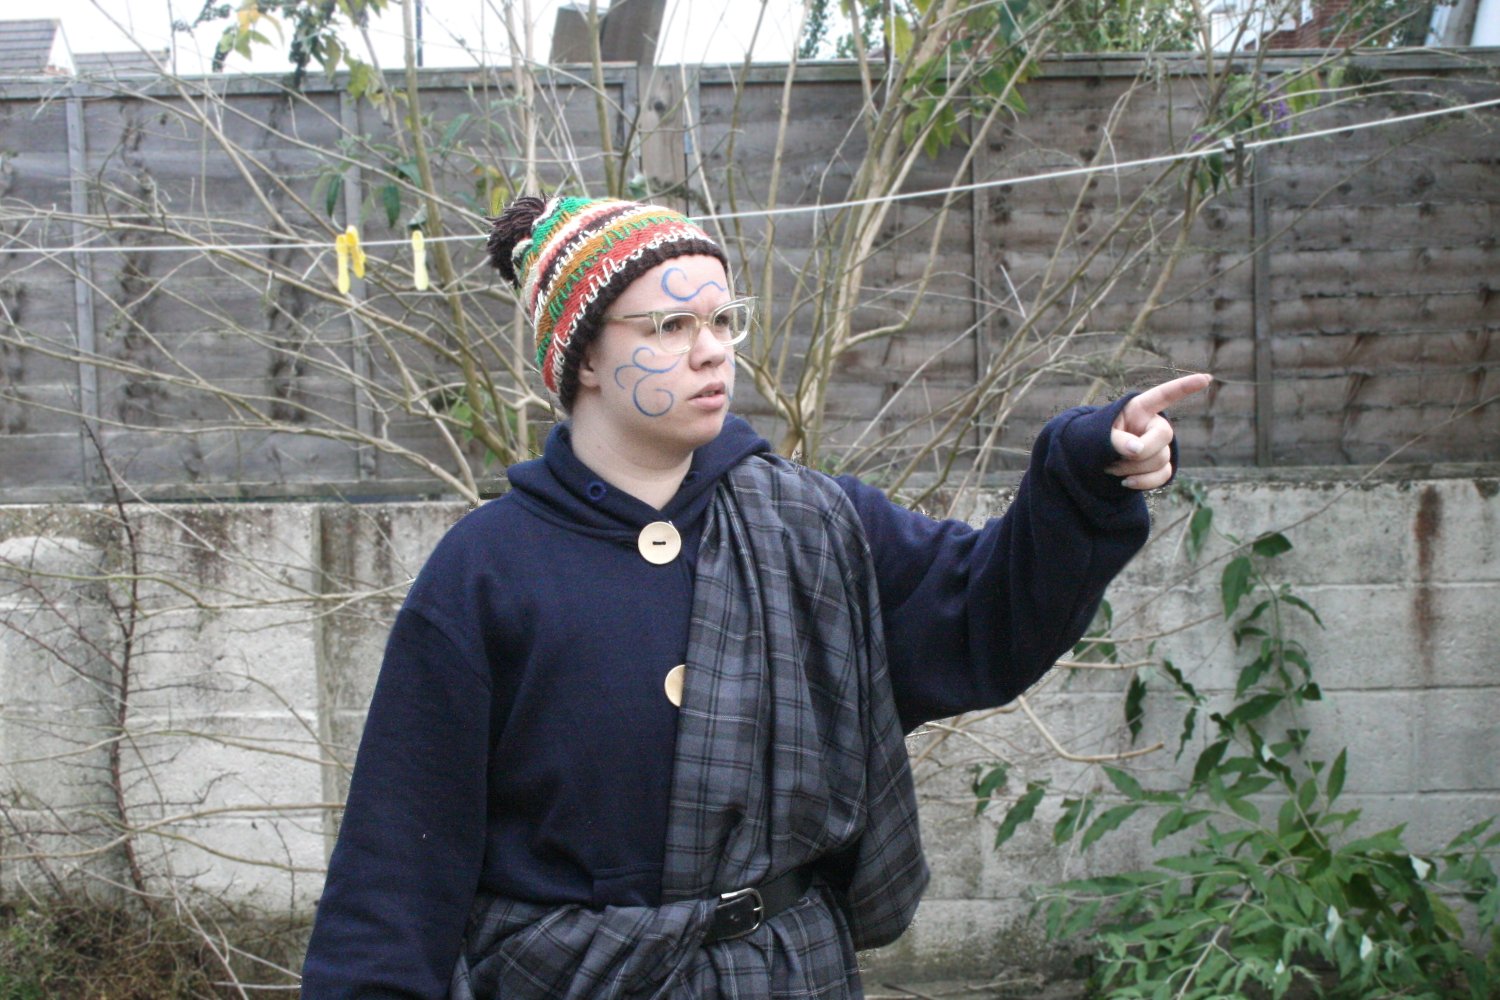 The Nardole costume consisted of a hand knit hat, a sweatshirt, pajama pants, and a kilt. The kilt was simply a huge piece of fabric with serged edges. Unlike how the kilt is worn in the show, I wore mine the same way that one would wear a great kilt.
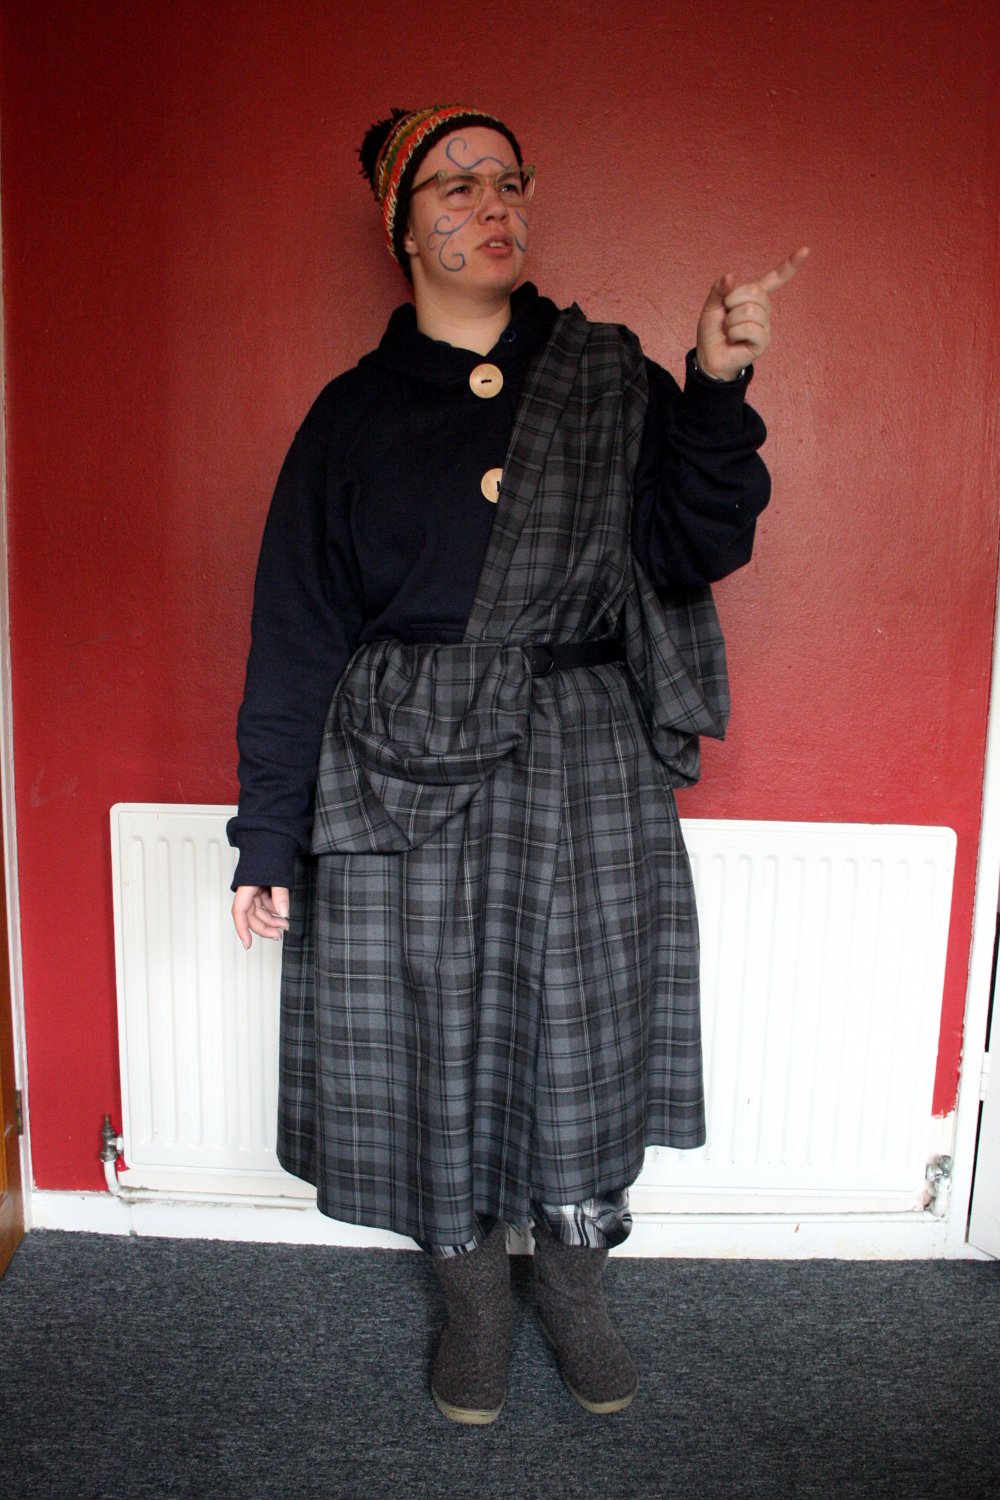 Since the sweatshirt was fairly simple in design, I opted to modify a blue zip up sweatshirt I already had instead of making one from scratch. I started by taking out the zipper and the hoodie cord. Then, I added buttonholes and large wooden buttons down the front of the hoodie. Even though I'd taken out the bright white hoodie cord, the eyelets in the hood were still visible in bright silver, so I buttonhole stitched all the way around them.
 The hat I wore is one I've already posted about, and have actually written up a pattern for, so be sure to check that out!This is, by far, one of the most comfortable cosplays I have ever worn. I basically got to walk around in pajamas all day, it was great!
Wilf's Hat from The End of Time
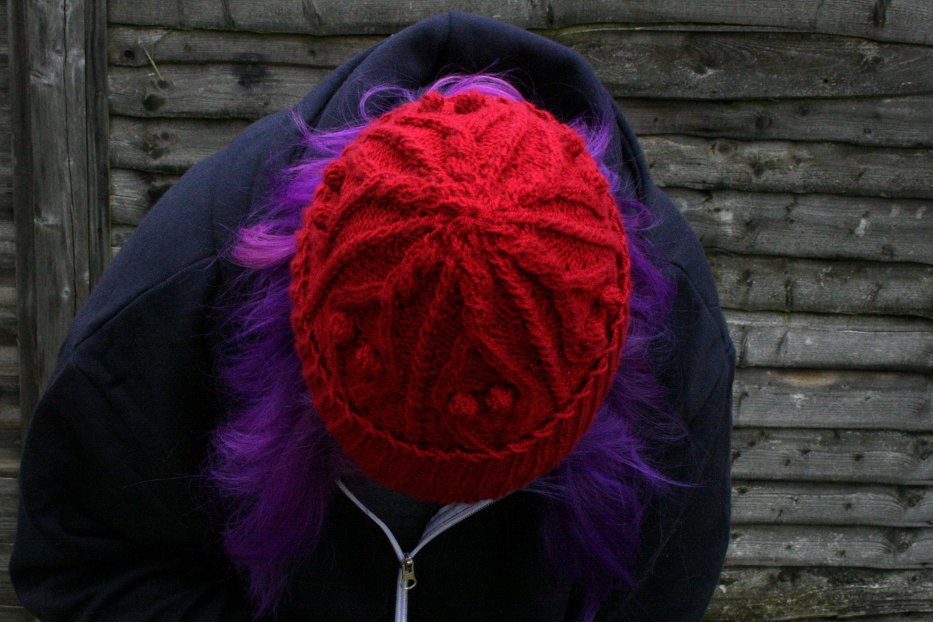
After knitting two of Nardole's hats, I felt as though I needed more hats. Why? I don't know, I can't possibly find the time to wear them all if I keep making them at this speed! This hat is Wilf's hat from the Doctor Who episode The End of Time. I remember when I first watched the episode I noticed the hat, but I didn't think I'd end up making it because it looked so complex.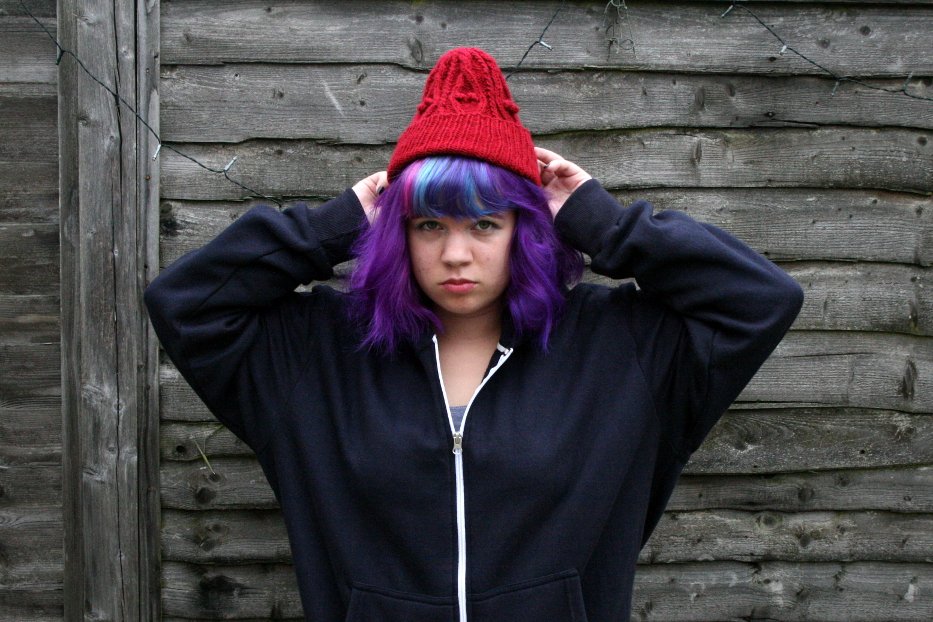 Fast forward to a few months later, and I've knitted up the hat! I found a this lovely pattern by Patricia Schönhold on Ravelry. It was my first time knitting from a chart, as well as my first time knitting bobbles. The pattern was easy to understand, and I had no problems with any of it.
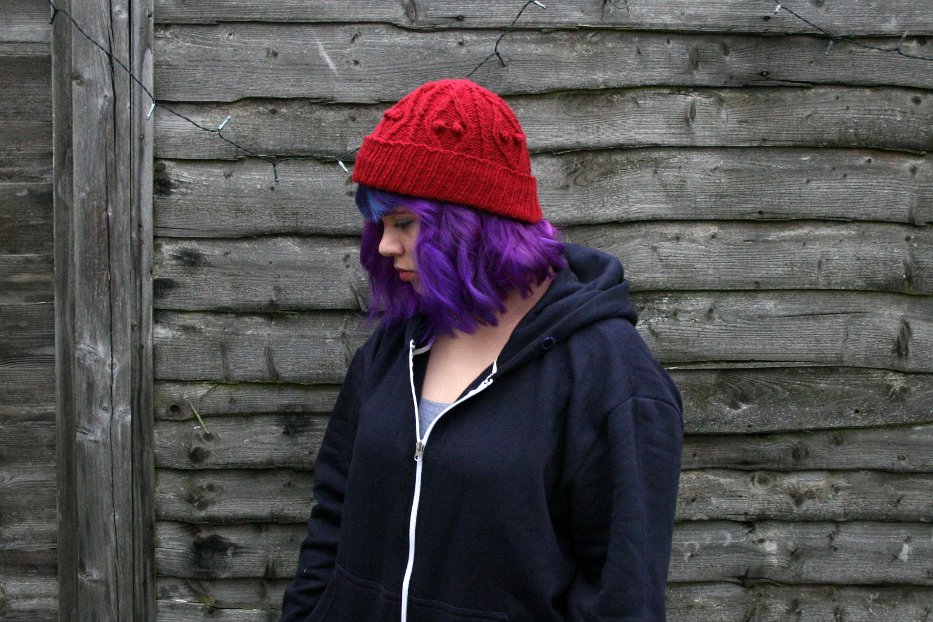 I knitted this hat up with Stylecraft Special DK in Lipstick (this might be wrong, I've lost the label) with size 8 (5.0 mm) knitting needles. I realize I've used Stylecraft in most of my recent projects. That's because Stylecraft is really easy for me to get and it comes in a huge number of colors.
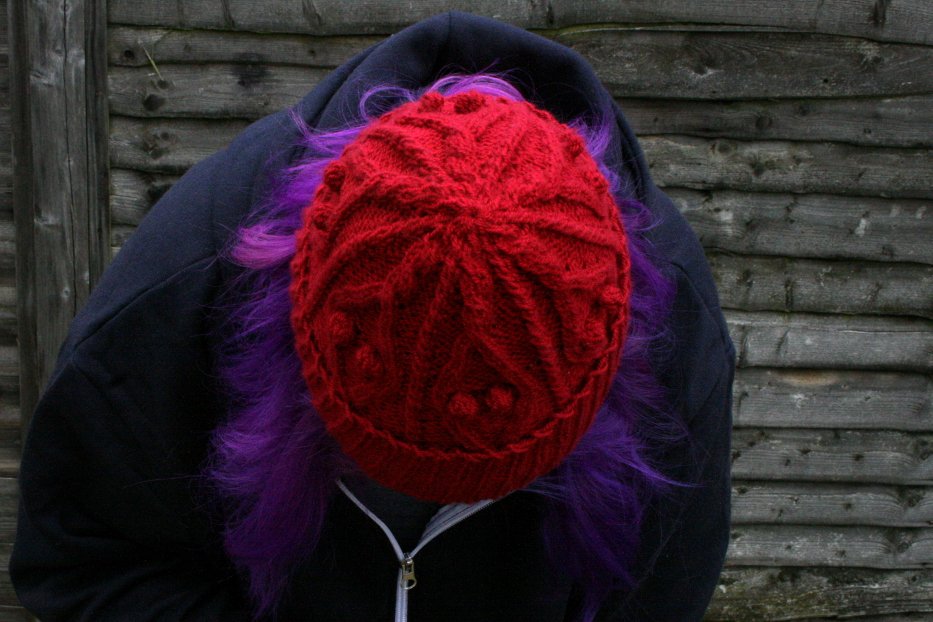 I did end up changing the pattern just a bit. Near the crown of the head, I added two extra twists in the large cables. Because of this, the number of stitches I had on my needles did not match up with the pattern and I ended up decreasing differently. I don't remember exactly what I did, but the difference is visible.
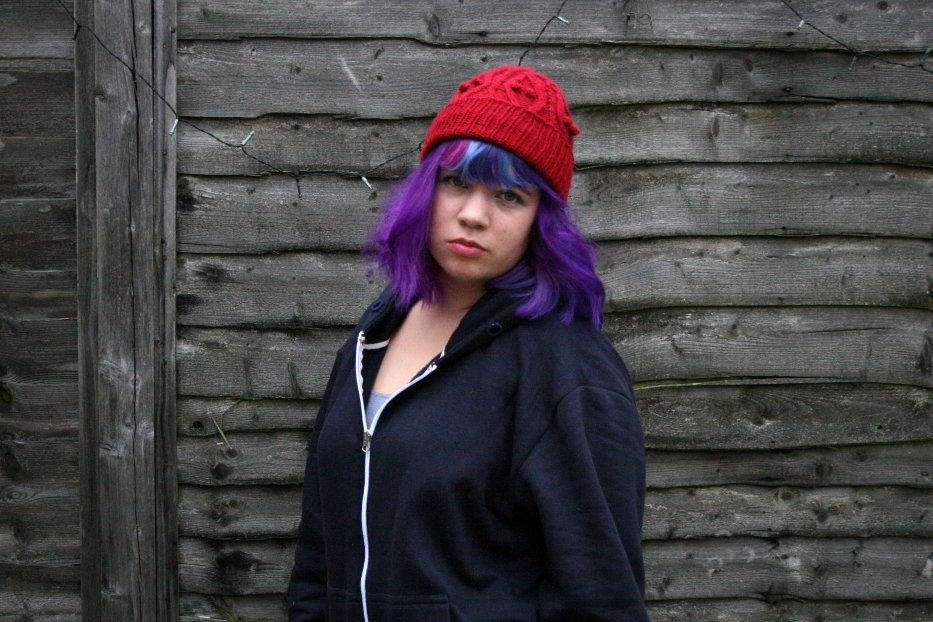 I'm very happy with Wilf's hat, and I definitely wouldn't have been able to make it without the pattern I found. I am glad that Patricia Schönhold put this pattern up, and I would recommend it to anyone else looking to make Wilf's hat.
Nardole's Hat from The Doctor Falls
That's right! I made another one of Nardole's hats! This one is from last week's Doctor Who episode, The Doctor Falls. It was super simple to make compared to the last one!Even though I'm very happy with how my hat turned out, the pattern I've put at the bottom of the post is slightly different from the hat pictured here. This is because the one I made is small (it fits my head, but it might not fit yours), and I mistakenly made my hat a bit too short.What you'll need:
US size 8 needles (5mm)
Double knit or worsted weight yarn
I used Stylecraft Special DK in 1035 Burgundy and 1709 Gold.
Cast on 96 st, k1, p1, all the way around for 9 inches, then work the following rows:
It may help to divide your stitches into 6 equal sections of 16 stitches
Row 1: *p2tog, k1, p1, k1, p1, k1, p1, k1, p1, k1, p1, k1, p1, k2tog tbl, repeat from * (total of 84 stitches)
Row 2: p1, k1, all the way around
Row 3: *k2tog, p1, k1, p1, k1, p1, k1, p1, k1, p1, k1, p2tog tbl, repeat from * (total of 72 stitches)
Row 4: k1, p1, all the way around
Row 5: *p2tog, k1, p1, k1, p1, k1, p1, k1, p1, k2tog tbl, repeat from * (total of 60 stitches)
Row 6: p1, k1, all the way aroundRow 7: *k2tog, p1, k1, p1, k1, p1, k1, p2tog tbl, repeat from * (total of 48 stitches)
Row 8: k1, p1, all the way around
Row 9: *p2tog, k1, p1, k1, p1, k2tog tbl, repeat from * (total of 36 stitches)
Row 10: p1, k1, all the way around
Row 11: *k2tog, p1, k1, p2tog tbl, repeat from * (total of 24 stitches)
Row 12: k1, p1, all the way around
Pull the yarn tail through remaining stitches, pull tight, and secure ends.
All that's left is to add your pom pom on top and you're done!
Nardole's Hat from The Eaters of Light
This is my version of the hat that Nardole wears in the Doctor Who episode The Eaters of Light. When this episode aired last week, I immediately knew that I needed to make his hat. It was fairly simple to make, and I'll share my process so that anyone who wants one can make one too.What you'll need:
US size 8 needles (5mm)
Double knit or worsted weight yarn
Special Stylecraft DK in Lemon Shade 1020
Special Stylecraft DK in Dark Brown Shade 1004
Special Stylecraft DK in Green 1116
Special Stylecraft DK in Camel 1420
Special Stylecraft DK in Spice 1711
Cast on 70 stitches in the round in dark brown (must be a multiple of 10)
Rows 1-13: k1, p1 all the way around
Row 14: fold the brim to the inside of the hat attach to previous row with k1, p1
From here on, the every row is purled. (The design is worked on top after completion)
1 row in lemon, 7 rows in spice,
1 row in green, 7 rows in camel,
1 row in lemon, 7 rows in dark brown,
1 row in spice, 7 rows in lemon,
1 row in camel, 7 rows in green,
1 row in dark brown, 7 rows in lemon,
1 row in spice, 7 rows in dark brown.
On the last row, pull a piece of yarn through all of the stitches. Do not gather it yet, it is easier to work in the design beforehand.
The design on top is made by weaving pieces of yarn that are the same color as the single rows. They are woven around the knit stitch below this row and brought up to the stripe above at varying heights. This is difficult for me to explain, but I hope the pictures are good enough to understand what I mean. After making the design, tighten the yarn you previously pulled through the top row of stitches and secure. Make a large pom pom out of the dark brown yarn and attach it to the top.
If anyone does make this hat, be sure to let me know!
Since it's summer, I doubt I'll be wearing the hat any time soon. As soon as cold weather hits, though, I'll be wearing it all the time!
Doctor Who - The Fourth Doctor
Last weekend was London MCM 2017! I went all three days and had a fantastic time. I didn't cosplay the first day, but I wore my french fry dress and got a surprising amount of complements as well as a photo request! If I am able to track down the photo, I'll be sure to share it here! On the second day of MCM, I dressed as the fourth regeneration of the Doctor from Doctor Who.
 Most of the outfit is store bought, but I made both the scarf and the skirt. I knitted the scarf in fifty hours over the course of 5 months, starting on the first of January and finishing just last week on the 6th. My research for the scarf design was a combination of this site and meticulous combing through yarn websites. The scarf is a replica of the scarf worn by Tom Baker in the first half of season 12 of Doctor Who. I think I was able to find a very good color match with the yarn. It took a bit longer to make than I thought it would, and I made a few tiny mistakes, but I am very happy with it. I made it using US size 8 knitting needles.
 The skirt is actually one I made for my costume course at uni. It's an Edwardian skirt with center back snaps and hook and eyes. I did a very good job of pattern matching each seam, which is especially evident in the back panel. The synthetic plaid fabric is backed on a black cotton, and every seam is piped with the same black cotton.
 I met many lovely people at the Doctor Who meet up, but unfortunately I didn't take many pictures. I'm not really sure who took the above photo or who some of the people are in it, so please tell me if you know!
 If I end up going to LFCC this year, I'll be wearing this cosplay on one of the days. I plan on adding a waistcoat and possibly some nice shoes to the costume before then.


